Schedule to send Email by Python code
How to Schedule to Send email by Python code with attachments
NO BRAINER TIP
ExcelStarter
6/8/20242 min read
How to Schedule Emails with Attachments for Free
Hey everyone! In this post, I'll guide you through the process of scheduling emails with attachments for free using Python and built-in Windows tools. You don't need to purchase any software to achieve this.
Why This Idea Came About
I needed to send a daily report to my managers every morning at 8 o'clock. The report is automatically updated and downloaded to a specific folder. To automate this process, I found a way to use Python and Windows software to schedule these emails.
Step-by-Step Guide
Step 1: Install Python
Installing Python is straightforward. Just visit the Python website, download the installer, and run it to install Python on your system.
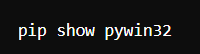
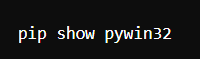
Step 2: Install the Necessary Plugin
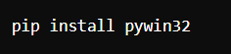
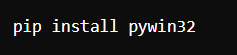
We need the pywin32 plugin to send emails via Outlook. Open your command prompt by typing CMD in the Start menu. Then, check if pywin32 is installed by typing:
If it's not installed, you can install it by typing:
Step 3: Write the Python Script
Open Notepad and copy the following code into it. Don't worry, I've included this code in the description of my video for easy copying.
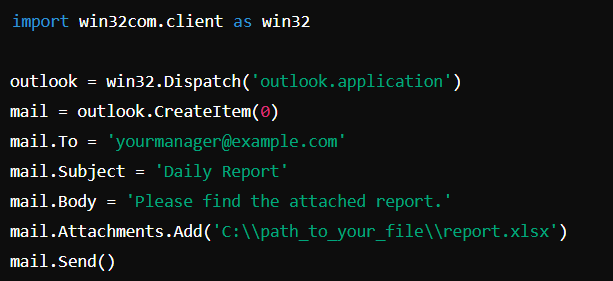
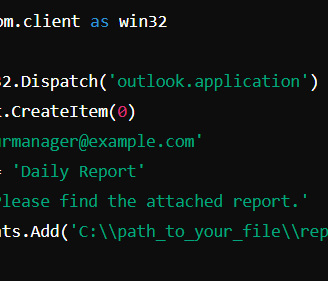
Customize the mail.To, mail.Subject, mail.Body, and the mail.Attachments.Add with your specific details. Save the file with a .py extension, for example, send_email.py.
Step 4: Schedule the Task
Windows has a built-in Task Scheduler that we can use. Search for "Task Scheduler" in the Start menu and open it. Follow these steps:
Click on "Create Task."
Name your task, for example, "Send Daily Email."
Go to the "Triggers" tab and click "New." Set it to trigger daily at 8:00 AM.
In the "Actions" tab, click "New," and select "Start a program." Browse to your Python script (send_email.py).
Click "OK" to save the task.
Step 5: Test Your Task
To ensure everything is set up correctly, select your task in Task Scheduler and click "Run." You should see the script running and a message indicating the email was sent successfully. Check your mailbox to confirm the email was received with the attachment.
Conclusion
With these simple steps, you can automate the sending of emails with attachments without spending any money on additional software. I hope you found this guide helpful. If you have any questions, feel free to leave a comment below. Don’t forget to subscribe to my YouTube channel for more tips and tutorials.
See you next time! Bye!